Common Mistakes in Fabrication, Installation & Post-installation for Caesarstone ICON™ Surfaces
We at Caesarstone® believe that being a Master of Stone means participating in an ongoing journey of learning that requires all stonemasons in the stone fabrication industry to be supremely professional, with extensive knowledge and diverse skills.
To support you on this journey, we have created a guide that summarises common mistakes in fabrication, installation and post-installation. It includes information about the causes of these mistakes and proposed solutions to prevent them. Please see the Fabrication & Installation Guide for full details.
This guide will help you to work professionally and save valuable time and money.
Fabrication
1. Storage
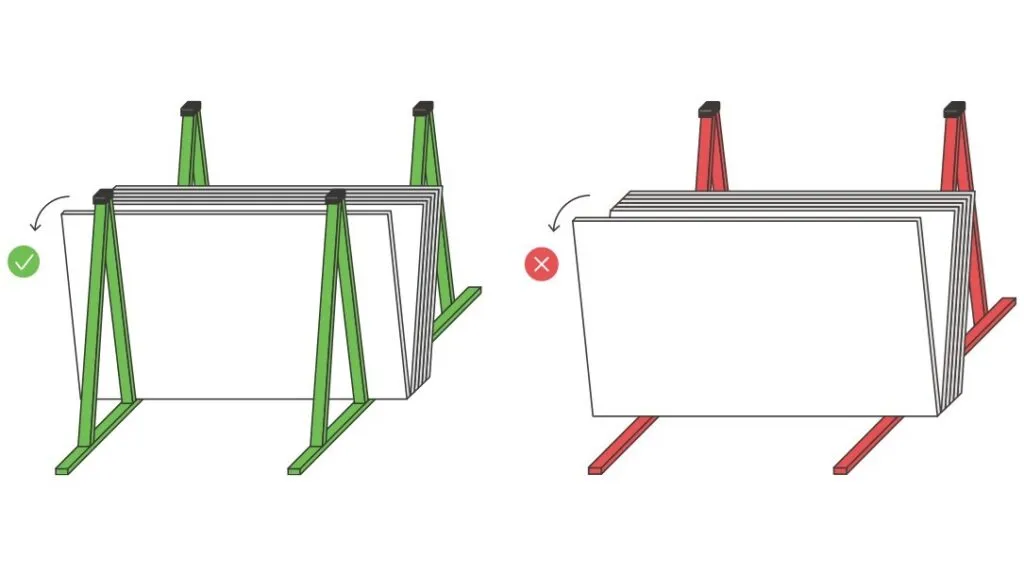
Falling from Open end of Rack or A-Frames
Cause Slabs stored on open ends of rack or A-frames
Solution
Do not store slabs on the open ends of racks or A-frames as there is a danger of the slabs falling if tilted too far.
Slabs may be safely contained between the uprights of A-frames. This arrangement, although not ideal, is safer than open-ended A-frames. It should be used only as a temporary storage measure.
Warping
Cause Exposure to high temperatures
Solution Store the slabs in a cool place. If this is not possible, provide additional support by building a third post on the stand, or placing a 30 mm thickness slab against the posts.
Discolouring
Cause Exposure to UV light
Solution Store under cover, out of direct sunlight.
Scratches or other Surface Damage
Cause Polished surface exposed
Solution Store the slabs face-to-face and back-to-back, with the backs of the outer slabs in each rack facing outwards so that the polished surface is not exposed.
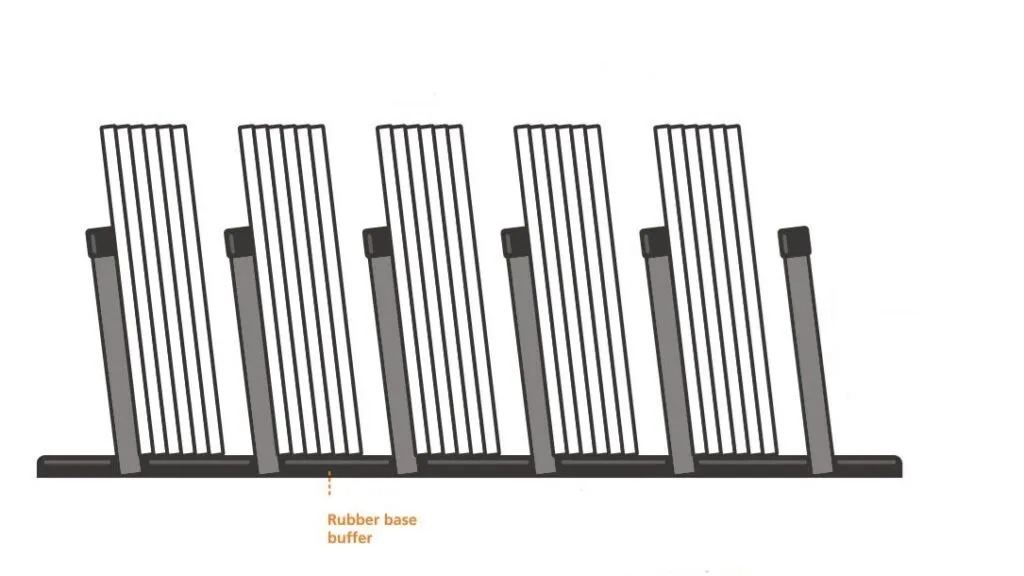
Chipping
Cause Slabs stored on metal base with no protective buffer
Solution Place rubber buffers on the base of the stand to prevent the slabs chipping.
2. Colour Matching
Colours not Matching on Seams or Changes of Slab Direction
Cause Adjoining pieces are from different batches
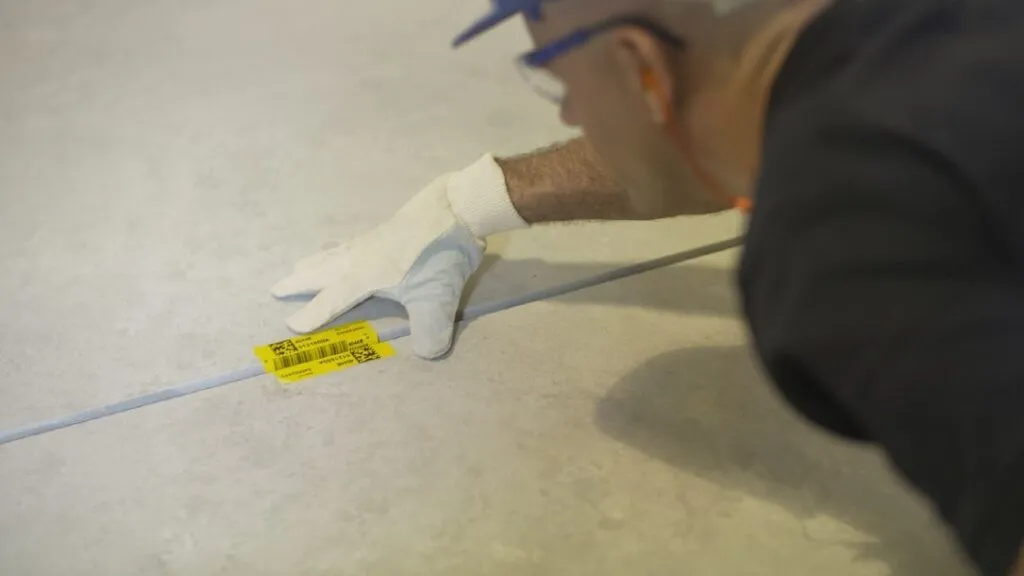
Solution Using slabs from the same batch for each job should ensure a colour match. However, always perform a visual colour match before cutting to confirm consistency in shading.
Each production cycle carries a different batch number. The batch number appears on the label affixed to all slabs and is also stamped on the back of the slab.
Fact: Caesarstone ICON™ surfaces are manufactured from natural materials. This may result in slight colour and aggregate variations between slabs and production cycles.
Colours not Matching on Seams or Changes of Slab Direction
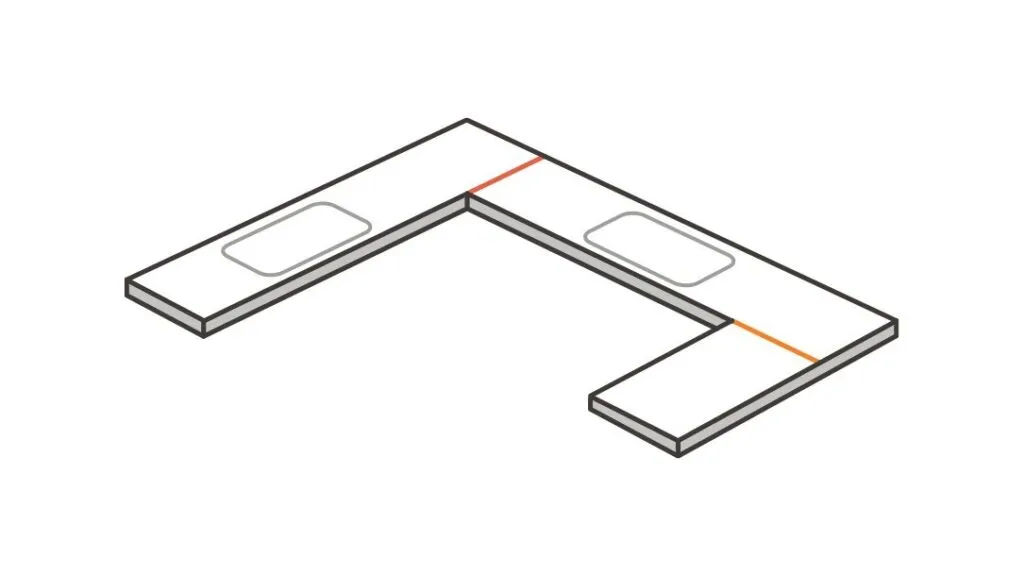
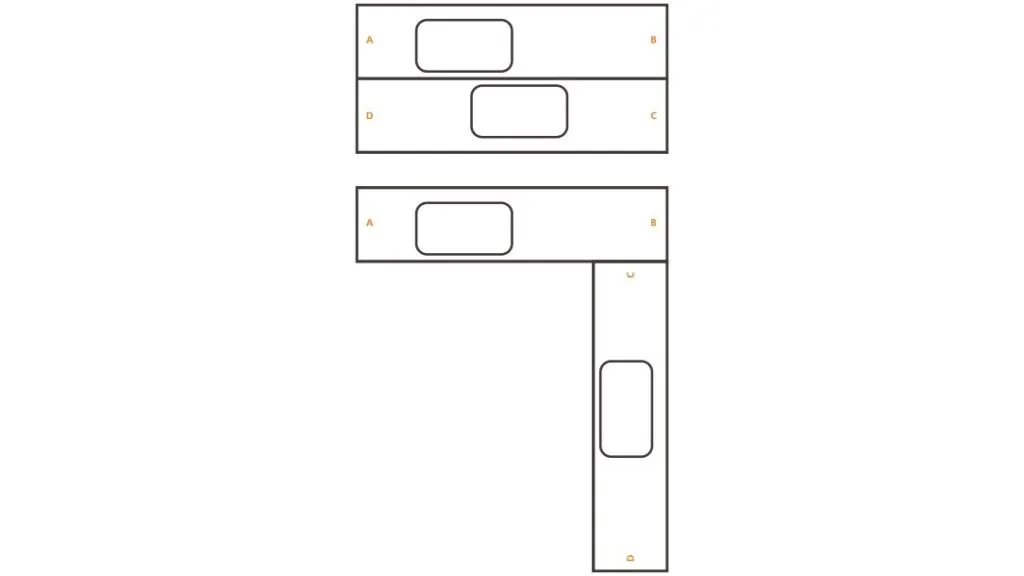
Cause Adjoining pieces are from different slab cuts
Solution When cutting slabs, try to keep ends cut from adjoining sections of the same slab butted up together. This will provide the best match for pattern arrangement and colour consistency. This is particularly recommended for installations in areas with a high amount of reflected light.
Example of plan of slab pieces
3. Pattern Matching
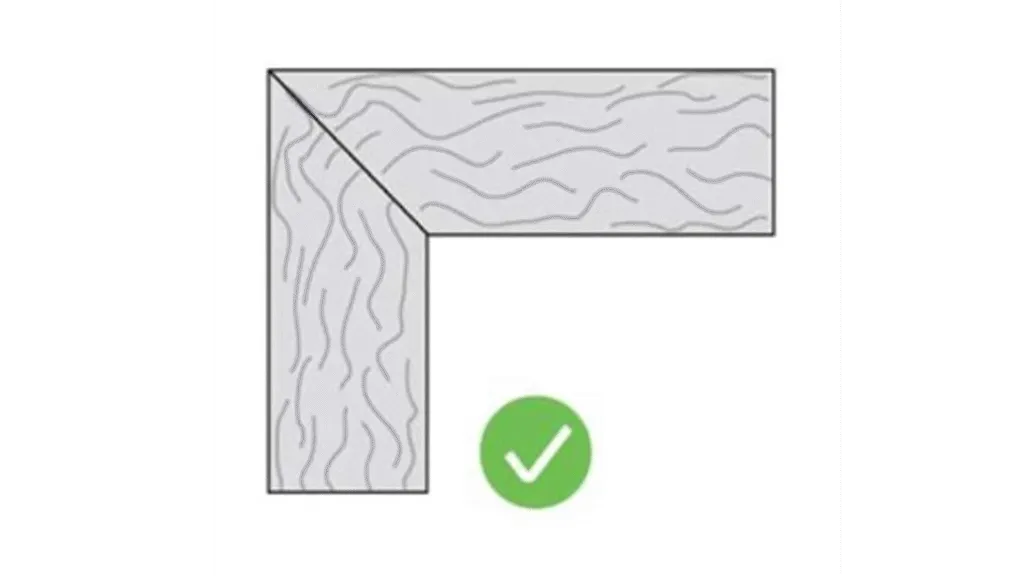
Patterns and Veins not Matching on Seams or Changes of Slab Direction
Fact: Some Caesarstone models are manufactured with patterns and veins, which need to be correctly matched for best appearance.
Cause
Not planning cuts in advance for best match.
Not wanting wastage.
Solution
Plan pattern match with clients.
Allow for more wastage for best pattern match.
Fabrication
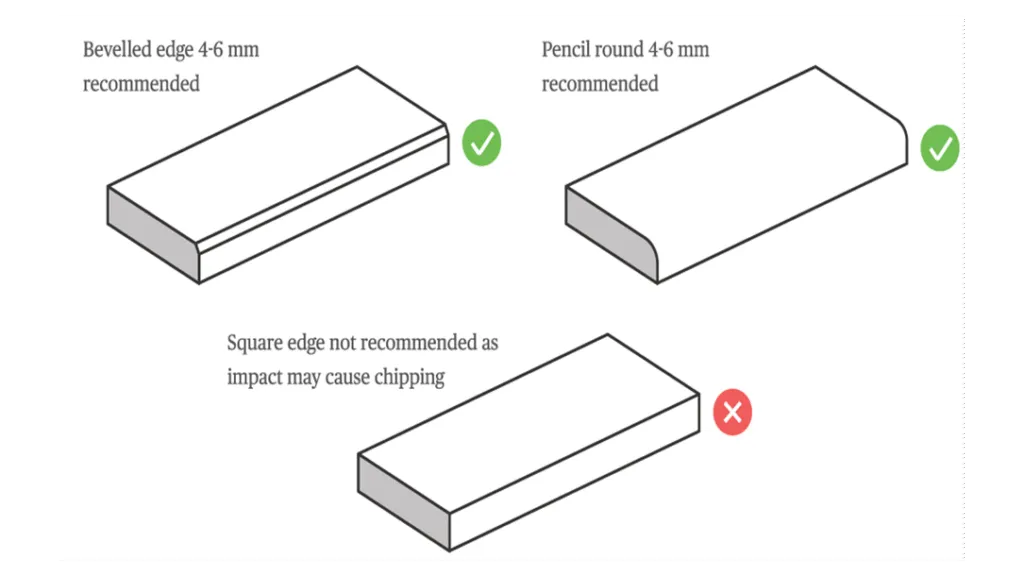
4. Chipping on Edge Profiles
Chipping on Edge Profiles
Cause Sharp edge profiles
Solution Do not create sharp edge profiles as impact may cause chipping. Edge profiles should be rounded or bevelled with a minimum edge profile of 3 mm, but preferably 4-6 mm. The larger the surface area of the edge profile, the more resistant it is to chipping.
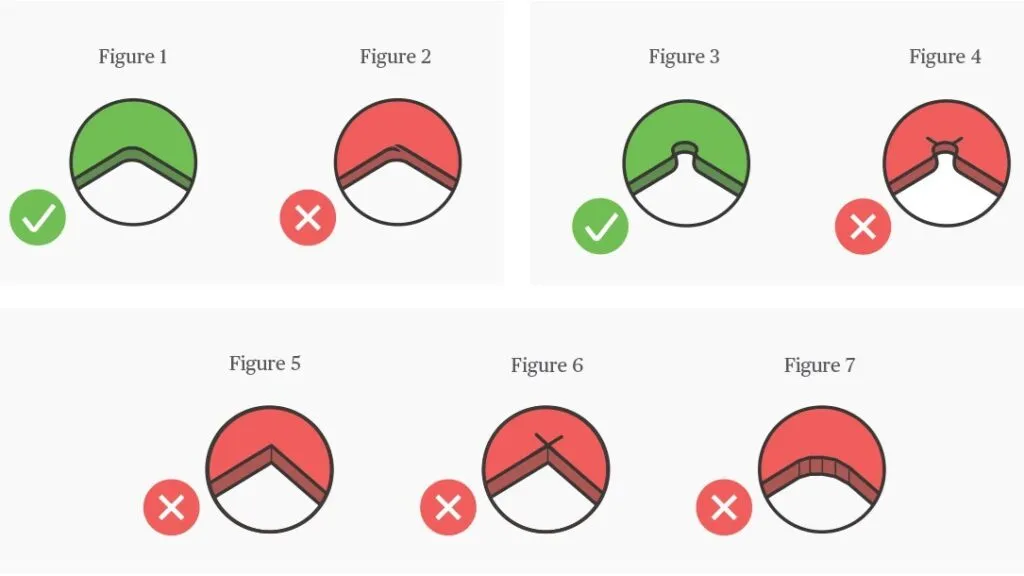
5. Cracks From Cutouts
Cracks Emanating from Sink/Cooktop Cutouts
Cause Insufficient/incorrectly fabricated radius on cutouts
Solution
Fabricate a minimum radius of 10 mm with a core bit/cup drill for all seen and unseen corners in cutouts; see figure 1. The larger the radius, the stronger the corner.
In the event that fabricating a 10 mm cutout corner radius would prevent the proper installation of an item that requires a 90° angle corner, drill beyond the corner with a core bit/cup drill; see figure 3.
Take care not to cut beyond the rounded edge in cutouts as in figures 2 and 4. Damage to the area may lead to the formation of hairline cracks.
Do not cut square corners or cross cut corners as in figures 5 and 6.
Do not cut a large radius in sections as in figure 7.
Installation
6. Seaming
Seams Opening * Seam Appearance * Adhesive Stains around Seams
Cause
Not working with professional seaming clamp.
Cabinets not level.
Insufficient support for seams, particularly in areas exposed to heat.
Solution
Preparation for seaming:
Ensure that the cabinets are level.
Attach wooden support strips to the cabinetry under seams. The centre of the seam should rest on the support strip.
We suggest the use of a full subdeck for added support in areas exposed to heat.
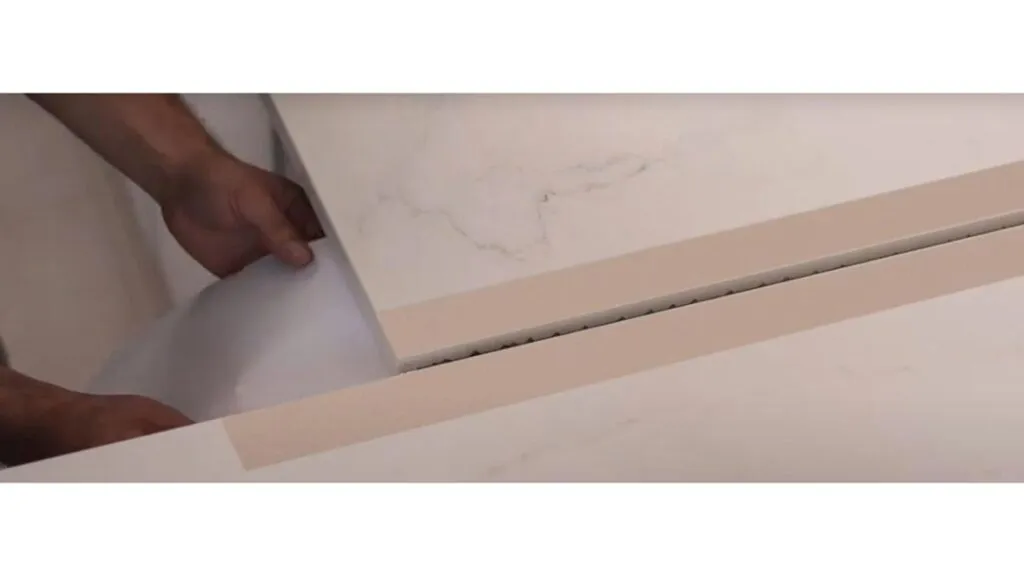
Seaming process:
Part the fabricated pieces of surface slightly at the seam.
Place a layer of paper, plastic film or plastic tape on the cabinet underneath the seam in order to prevent the adhesive from sticking the surface to the cabinet.
Apply tape to the edges of the surface to be seamed to prevent staining by adhesives.
Prepare a suitable colour-matched resin adhesive. Take into account that the colour may be slightly lighter after drying.
Ensure that the seam is clean of debris and clean the inside seam edges with alcohol.
Spread a generous amount of the adhesive on the inside of both sides of the seam.
Close, secure and straighten the seam with clamps or a professional seaming clamp to create a smooth, flush surface.
After the adhesive is completely dry, remove the clamps and the tape on the edges of the surface.
Remove any excess adhesive with a scraper or razor blade held at an angle to avoid chipping the adhesive.
Perform final cleaning with alcohol on a clean white cloth.
Do not polish seams on Caesarstone surfaces!
7. Polishing Surface
Fabricator Polished Surface and Made it Inconsistent with the Original Factory Finish.
Cause
Polishing the surface to try to remove scratches, imperfections or to level the surface.
Solution Do not polish the surface or seams to remove scratches, imperfections or to level the surface as this will create a polishing level inconsistent with the original factory finish. Please speak with your Caesarstone technical consultant.
Installation
8. Cracks Post-installation
Cracks Appearing Post-installation
Cause Insufficient support, particularly on long seams or void areas
Solution
Support Caesarstone surfaces on a substrate or a strong perimeter frame with all necessary supports.
For areas larger than 600 x 900 mm:
for 13 mm and 20 mm surfaces, use a 15 mm plywood substrate
for 30 mm surfaces use a 50 mm x 25 mm wooden batten/centre spine of clear pine or stronger – a full substrate is not required.
Provide front-to-back support underneath the surface every 500-600 mm.
Provide additional support for any cabinets wider than 600 mm.
For cutouts longer than 600 mm, provide side-to-side support beams under the surface.
Verify that the benchtop is sufficiently supported in areas of seams, cutouts and over spaces for appliances such as dishwashers, ovens, washing machines, etc.
Provide support under all benchtop seams.
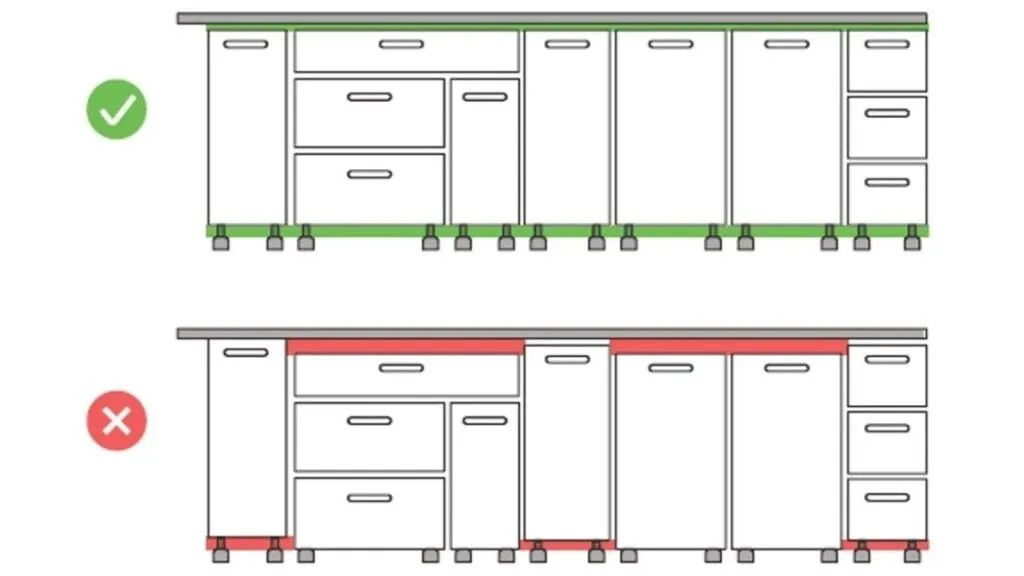
Cracks Appearing Post-Installation
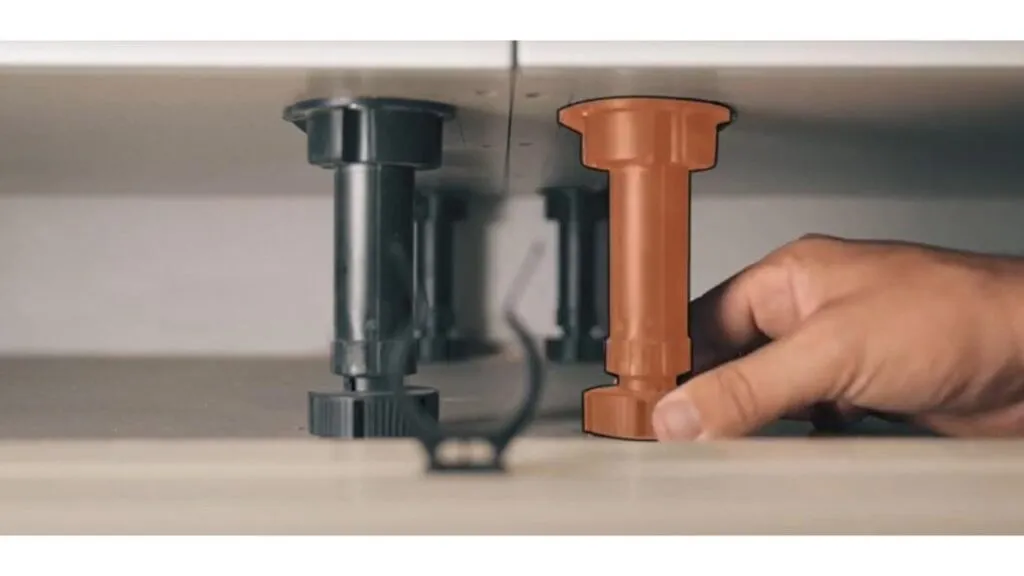
Cause Uneven or unstable cabinets
Solution
Before installing the surface, ensure that cabinets are complete, stable, level and suitable for bearing the weight of the surface.
The cabinets must be fixed to each other and secured to the back wall.
The front and back legs must be stable and in full contact with the floor.
Place all the fabricated pieces of the surface in their final position on the cabinets without adhesive. Check with a spirit level and long ruler that the surface is straight and level.
Cracks Appearing Post-installation
Cause Excessive heat
Solution We recommend placing hot pots, hot oven trays, frypans, and electrical cooking appliances onto a wooden chopping board or cork mat. Caesarstone surfaces are heat resistant, however, like all stone materials, they can be damaged by sudden and rapid surface temperature changes. A good rule of thumb is that if your hand cannot tolerate the level of heat of an item to be placed on the surface for more than a few seconds, then the heat source is too high.
Cracks Appearing Post-installation
Cause Undercutting
Solution Do not undercut on the bottom of slabs in preparation for gluing strips as this may contribute to cracking post-installation.
Post-installation
9. Post-installation Cleaning
Adhesive or Silicone Residue Left on Benchtop after Installation
Cause Benchtop not properly cleaned after installation
Solution
Thorough post-installation cleaning of dried adhesive or silicone residue is of paramount importance as it reduces time-consuming and costly remedial work.
Pour a small amount of oxalic acid in the centre of a soft cleaning cloth.
Pour lacquer thinner for dried adhesive, or denatured alcohol for silicone residue, directly on the powder and mix into toothpaste consistency.
Gently rub in a circular motion (like waxing a car) about 0.4 m2 of surface around the affected area for no more than one minute.
Wipe the mixture away with water and/or a glass cleaner such as Windex® to neutralise the chemicals.
The process may need to be repeated over the whole surface if it is over 6 months old or if sealer was applied.
Wear rubber gloves for this procedure.
10. Damage by Cleaning Materials
Factory Surface Finish Damaged by Use of Unsuitable Cleaning Materials
Cause Factory surface finish damaged by use of unsuitable cleaning materials
Solution
Do not allow your Caesarstone ICON surface to come into contact with strong acids or alkalis, oxidizers or similar materials, regardless of pH.
Do not use harsh cleaning products such as: oven/grill cleaners, dishwasher polishing agents, lye, caustic soda, paint strippers or any products containing trichloroethane or methylene chloride.
Do not use wax, sealers or other materials that may leave a film on the benchtop.
Use of acetone is forbidden on Caesarstone ICON surfaces. Alcohol is recommended for cleaning during installation.
Do not use abrasive scourers or Mr. Clean Magic Eraser as they can damage the finish/sheen of your surface.
11. Sealer
Stains Caused by Use of Sealer
Cause Use of sealer
Solution Do not use wax, sealers or other materials that may leave a film on the benchtop.